WordPress is one of the most popular blogging and CMS software—over 60% of blogs run on WordPress. Although installing WordPress is very easy, newbies may find it challenging.
This article is for those who do not know How To Install WordPress.
Most reputed web hosts have an automated mechanism to install WordPress. We may not be able to cover all such web hosts. However, this article will be more of a generic way through which you can install WordPress on any web host.
Table of Contents
Things You Need Before Installing WordPress
Before installing WordPress, you need a domain name and web hosting plan. You can go ahead with Namecheap for a domain name, and for web hosting, you can try Cloudways.
Once you have both, you need to update the nameserver and DNS records so that your domain name is pointing to the correct IP address.
How To Install WordPress
We can install WordPress using the two methods below. If you are using shared hosting, you can use an auto-installer, but for VPS and dedicated servers, the manual method is the only option.
- Using auto-installer
- Using Manual method
How To Install WordPress Using Auto Installer (Softaculous)
Auto Installer is a script that automates the installation of any web software. Usually, suppose you want to install any web software like WordPress. In that case, you need to create a database, connect the database to your WordPress installation, set backup options, and do many other tasks.
The auto-installer does everything for you with a single click, so there are fewer chances of making errors. That is why any newbie can also install WordPress using the auto-installer.
C Panel is the most popular and widely used web control panel. It comes with an auto-installer called Softaculous that automates installing WordPress.
Here are the detailed guidelines about how to install WordPress using the C panel
1. Login To C Panel
When you buy shared hosting, the provider will send you the C panel login details and URL. You must log in first with those credentials.
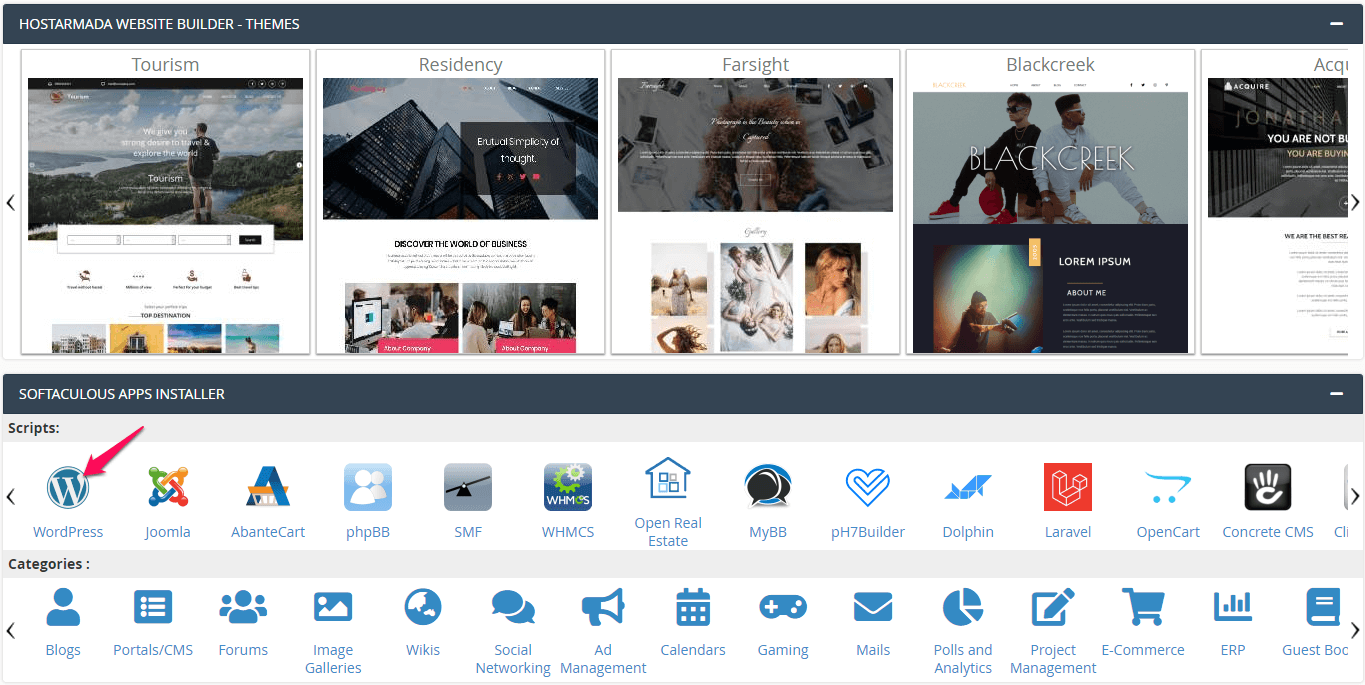
2. Search For Softaculous
Most web hosts provide Softaculous. If your web host offers this, go to the C panel home page and search for Softaculous.
Click on it to go to the Softaculous dashboard. Alternatively, you can access the WordPress option directly on the installation page.
3. Install WordPress
Click on ” Install Now” to go to the WordPress installation page.
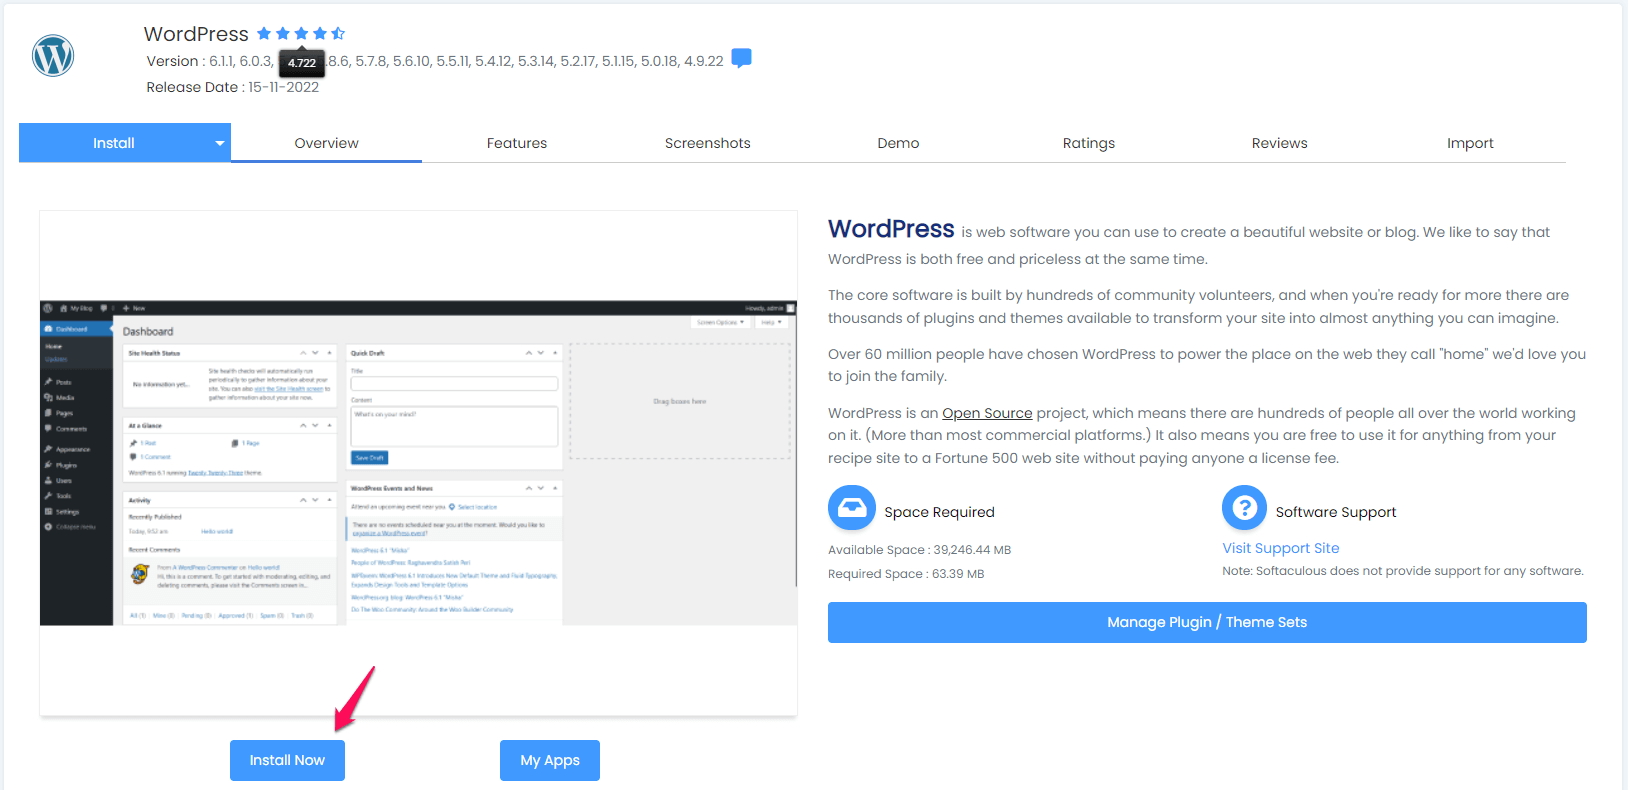
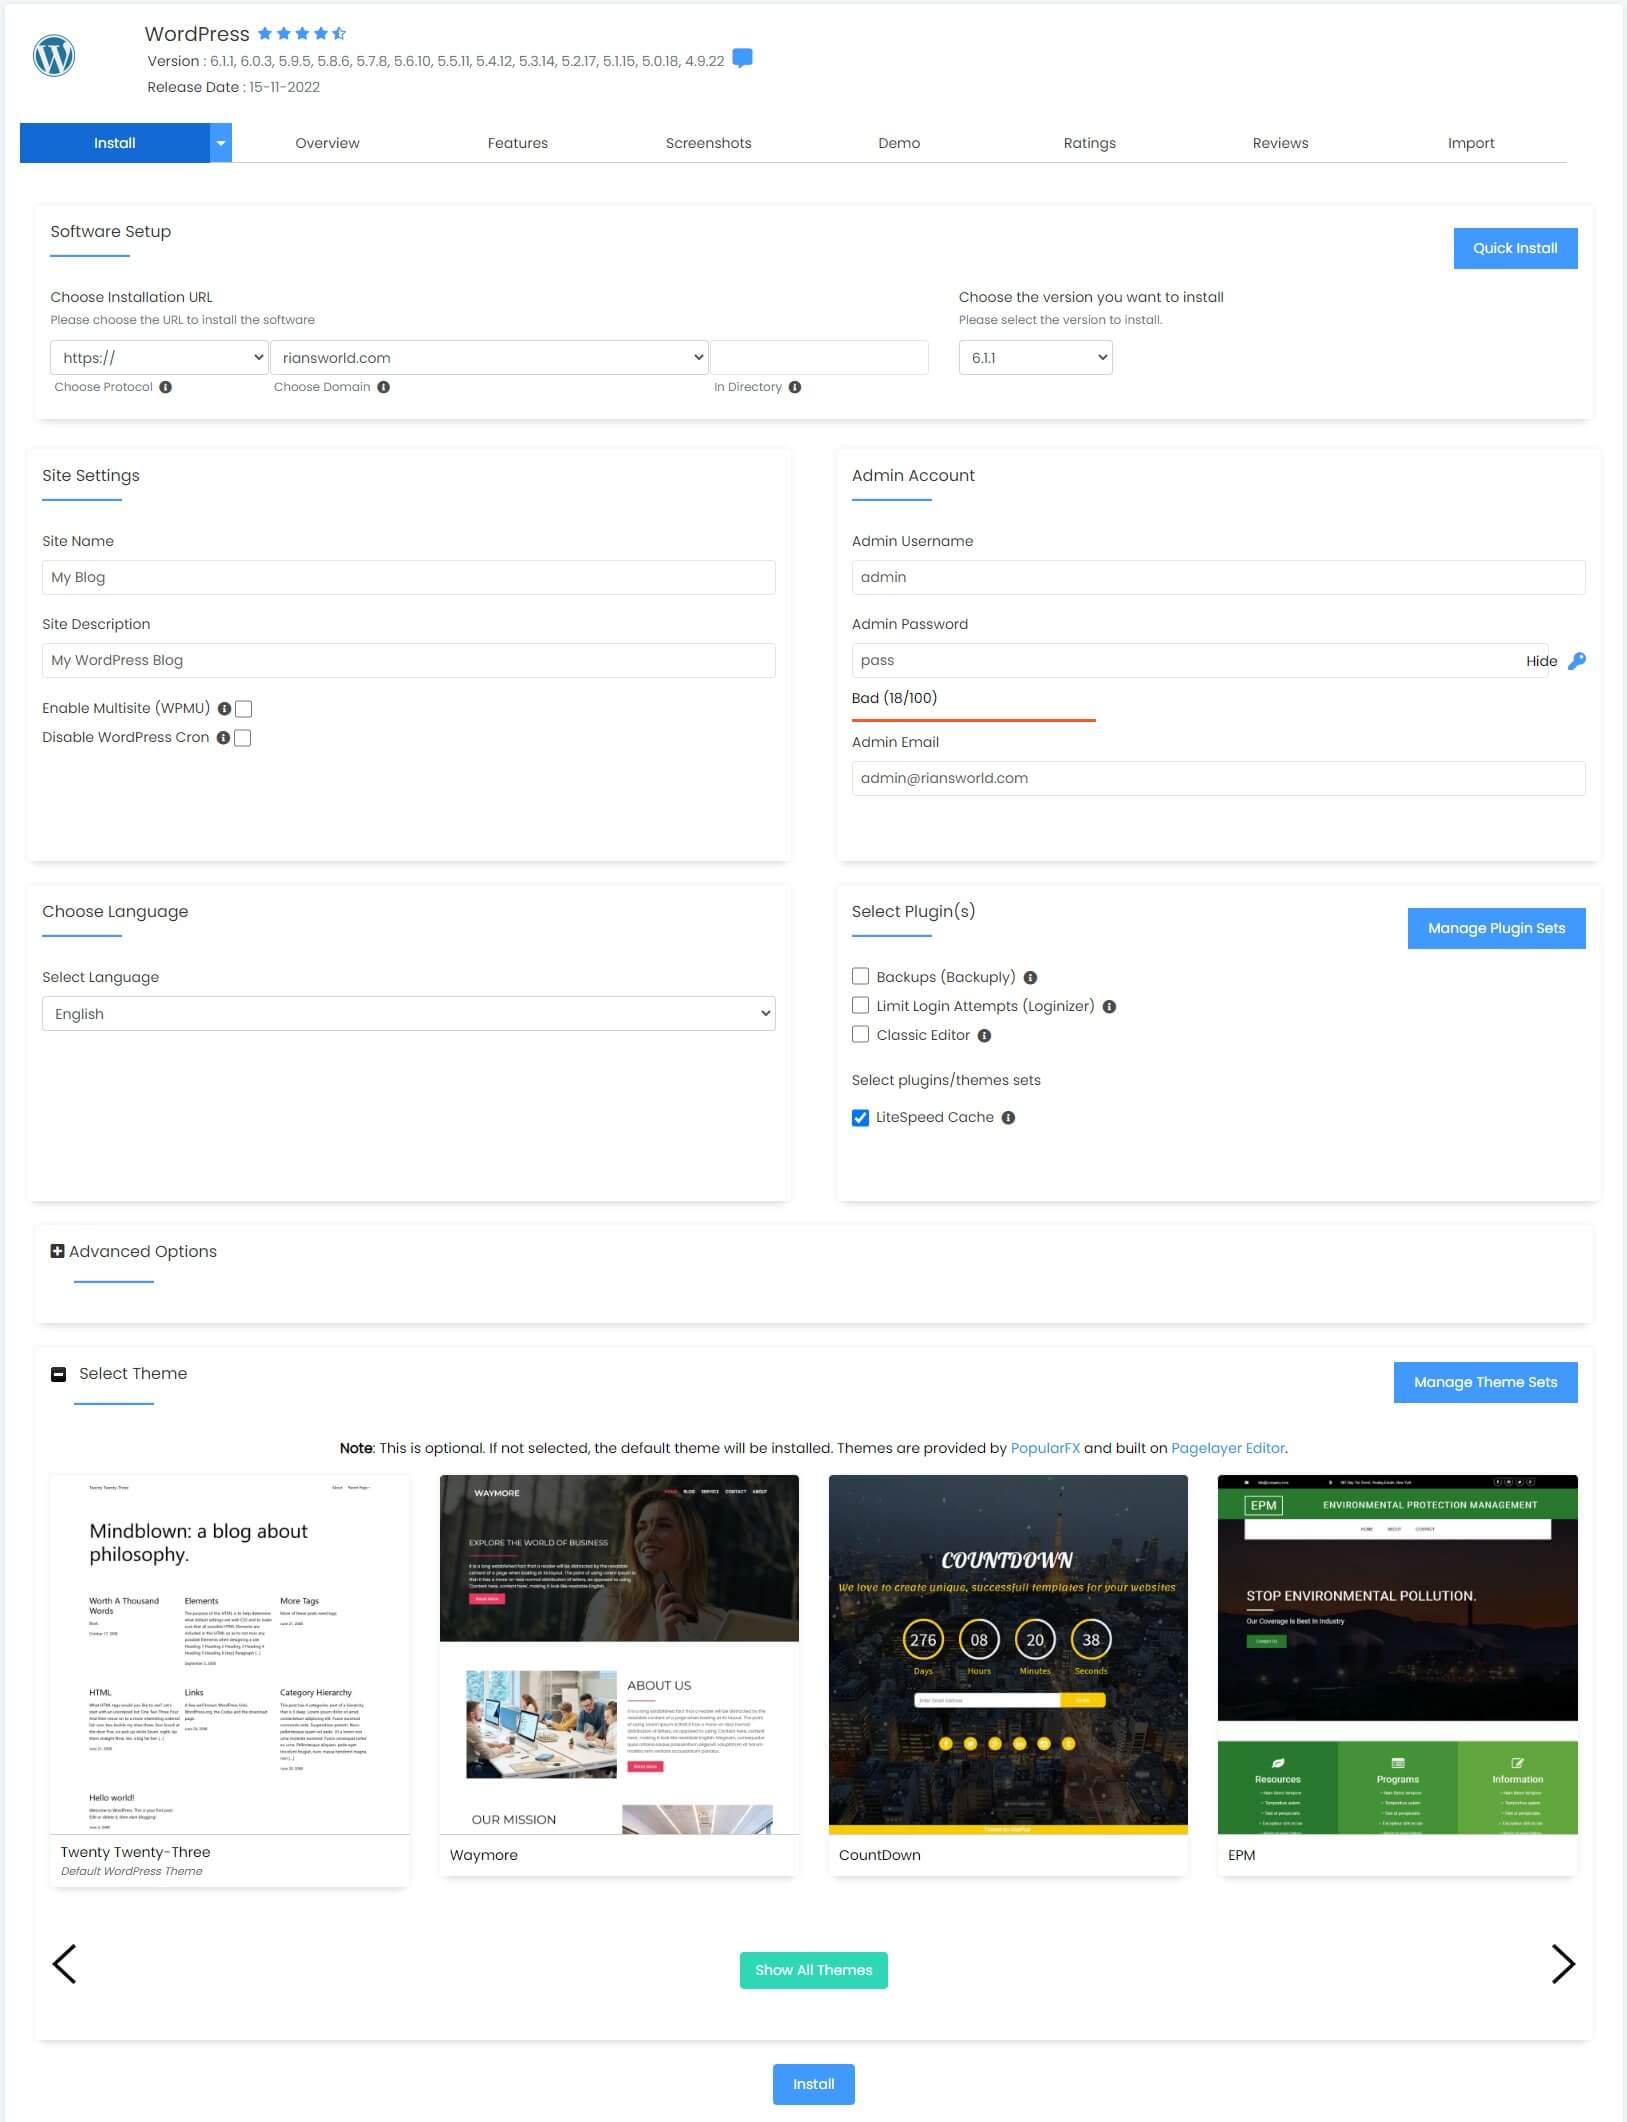
On the installation page, most options are self-explanatory. However, you must pay attention to the protocol, domain, directory, and version.
You will need to fill out the following details.
- Protocol: Here, you can choose whether you want HTTPS or HTTP. If you install it in the www subdirectory, choose https://www or HTTP://www.
- Domain Name: You must add the domain name in the C panel. Then only you can select it here.
- Directory: To install WordPress in a directory rather than the root, enter the directory name. The directory name should not exist; Softaculous will create it for you.
- Site Settings: Here, you need to choose your site name, description, admin ID, password, etc. You can change these later.
- Other Settings: Based on your web hosting, you may get options to choose a few plugins, themes, etc.
Once you fill in all the details, click on the “Install” button, which you will get at the end of the installation page.
It may take a couple of minutes to install WordPress.
How To Install WordPress Using FTP [Install WordPress Manually]
Installing WordPress using FTP is a universal method and should work with any host. Here are the steps that you need to follow.
1. Download WordPress
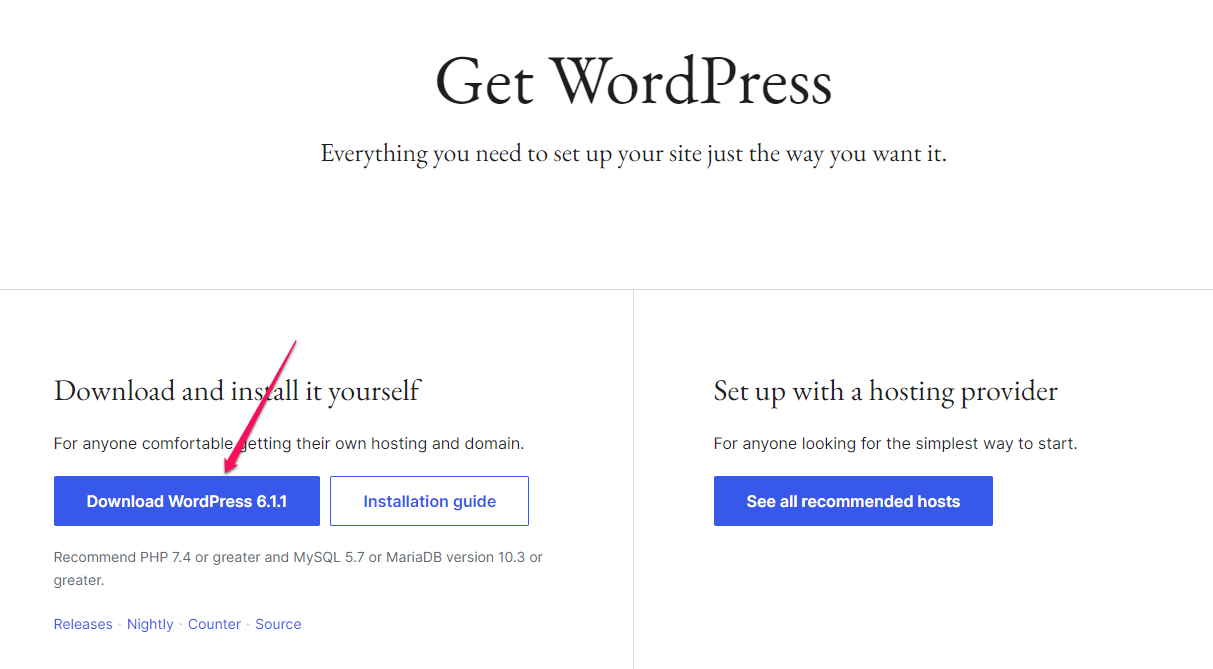
First, download the WordPress package to your computer and unzip it. You can download the package here.
2. Upload The Package To The Installation Folder
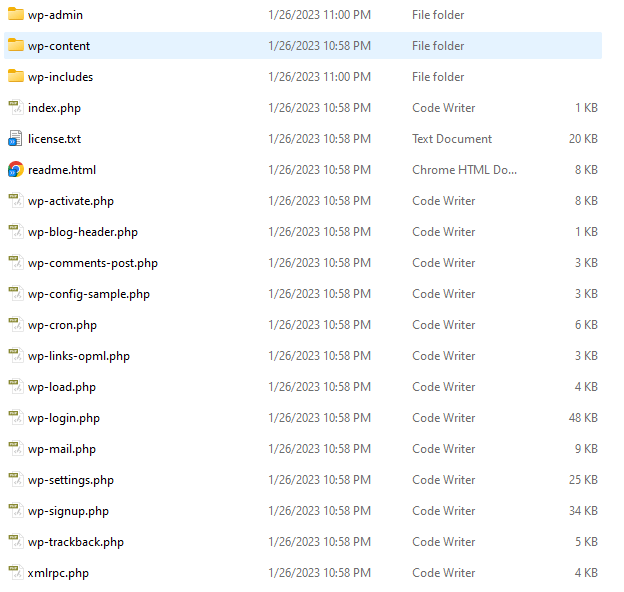
You must now upload the unzipped contents to the WordPress installation folder. It can be the root directory or any subdirectory where you want to install WordPress. You can use FTP software like FileZilla to upload the content.
3. Create MySQL Database
WordPress stores its information in a database. Therefore, a database will need to be created.
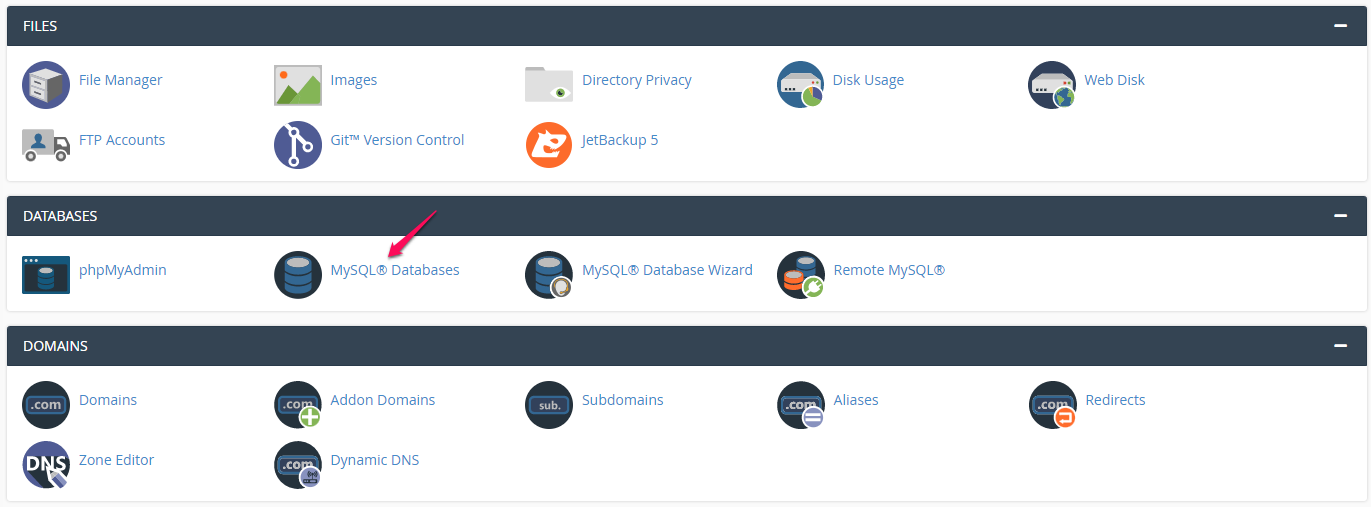
Navigate to SQL Service -> MySQL Databases, which will take you to the database creation page.
Enter the database name below and click on “Next Step.“

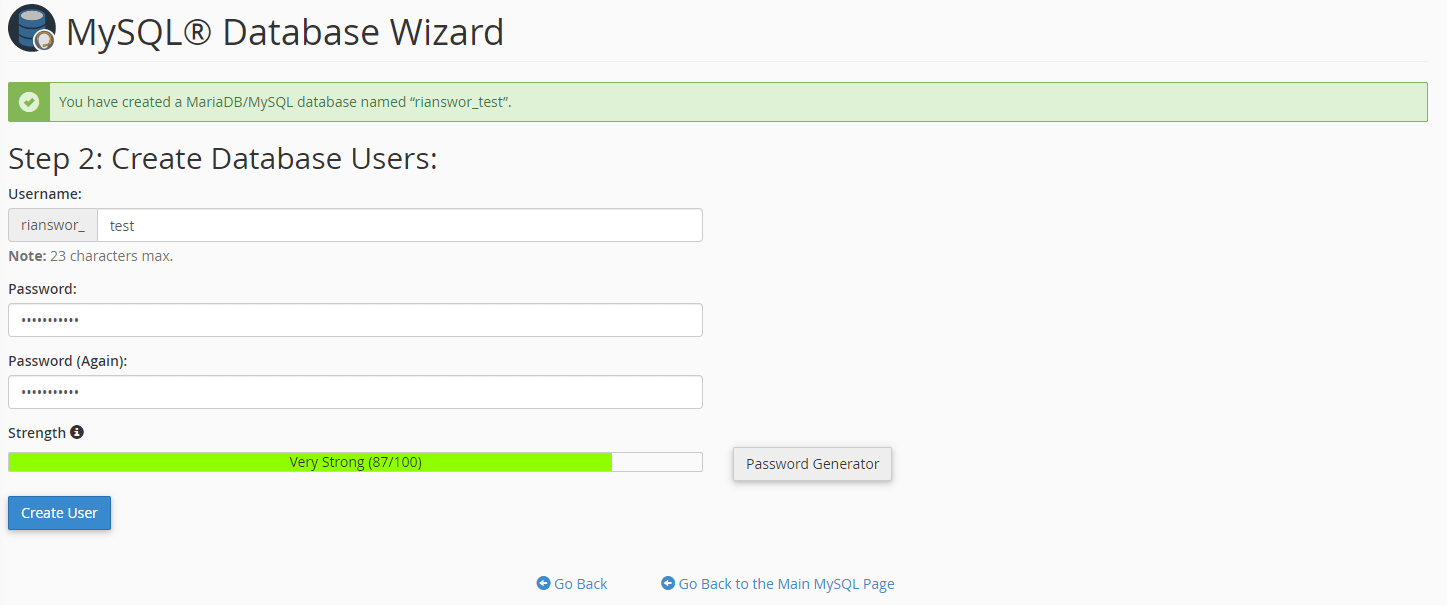
Enter the database username and password and click on “Create User.“
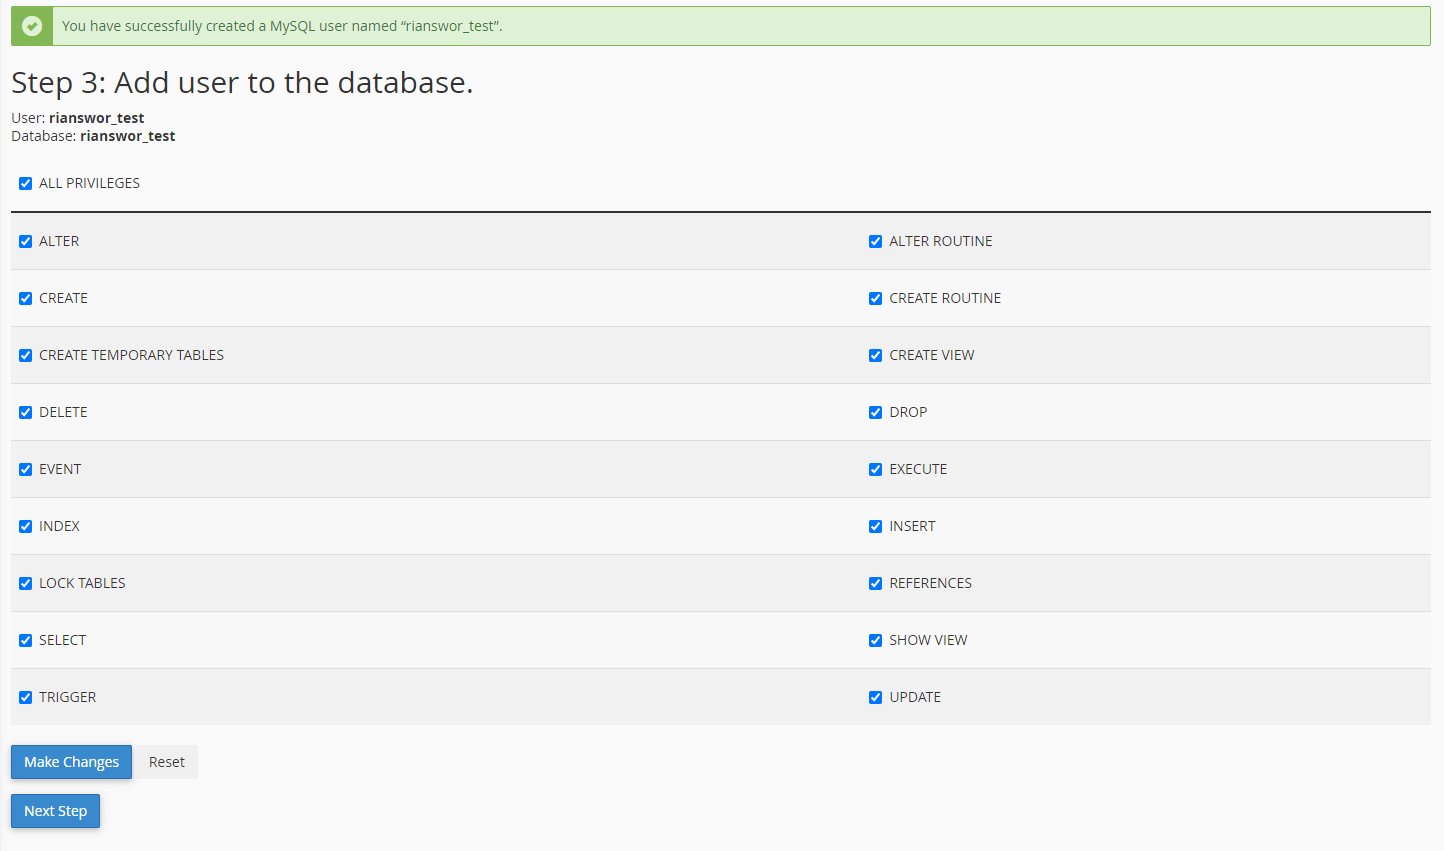
Give all privileges to the user for that database and click “Make Changes.“
4. Install WordPress
Now, you must type in the URL where you uploaded the WordPress package content. For example, if I uploaded the content to the “testing” folder of rianstech.com, we need to access the URL rianstech.com/testing to start the installation process.
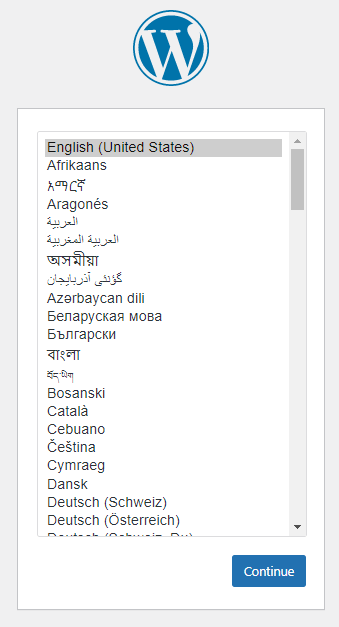
You will be presented with the welcome screen. Select the language and click on “Continue.“
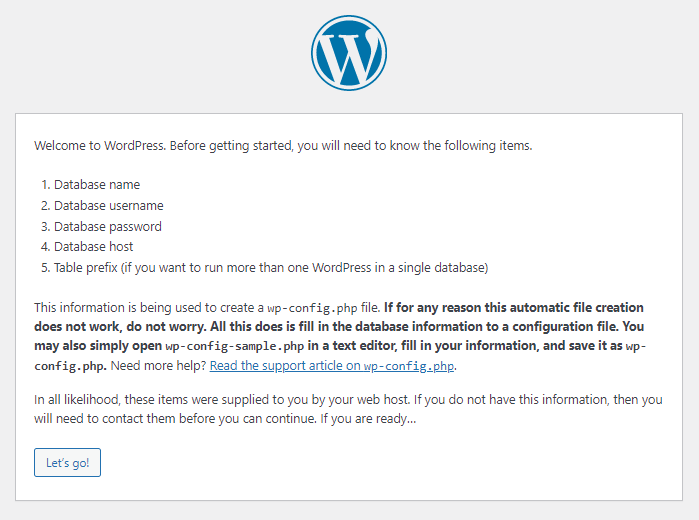
It’s time to connect the database we created in step 3. Click on “Lets Go“
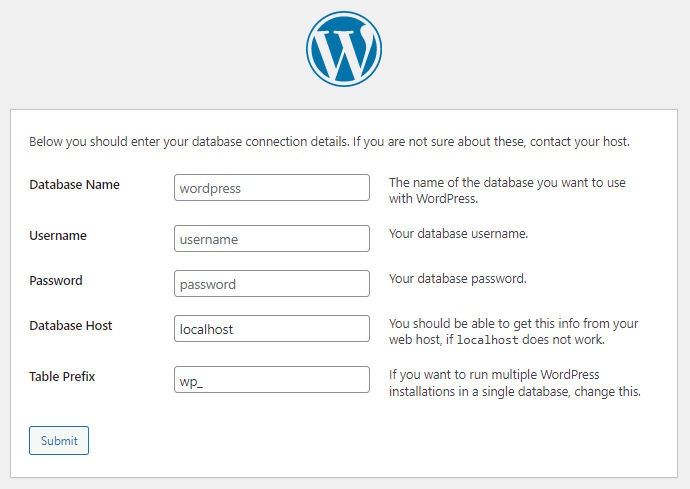
Enter the database name, username, and password. There is no need to change the database host and table prefix. Click “Submit“
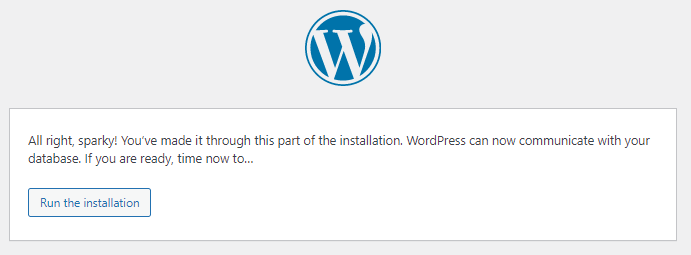
If you get the following message, your database connection is successful. Click “Run The Installation” to start the installation process.
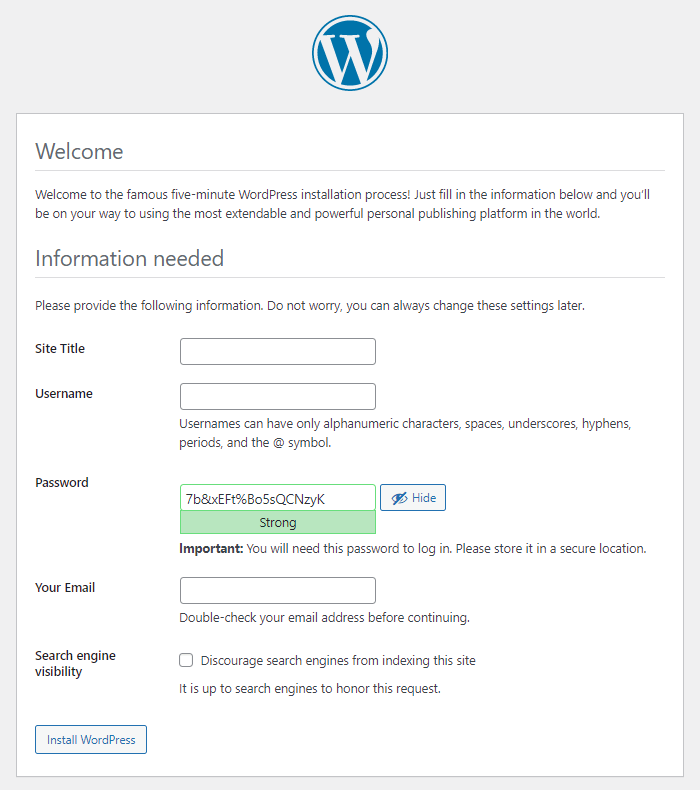
Enter the site title, username, password, and email address. You can change them later if you want. Once you’ve done this, click on “Install WordPress.“
After some time, you will get the message that the installation is successful. Click “Log In” to log in to the WordPress admin dashboard.
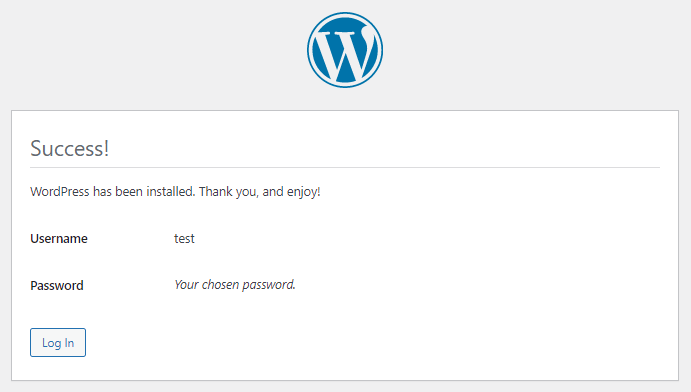
That’s it. You have successfully installed WordPress.
How To Install WordPress On Cloudways
You might have heard that Hosting a website on Cloudways is challenging, especially if you are moving from the C panel.
Yeah, the Cloudways interface may be confusing for many, but once you get around it, you will find every option well laid out.
We are here to help you host your first website on Cloudways. If you follow the steps below, you will be done in 10 minutes.
1. Sign Up For Cloudways
First, you need to buy a hosting plan. You can consider clicking this link, which will take you to the Cloudways home page.
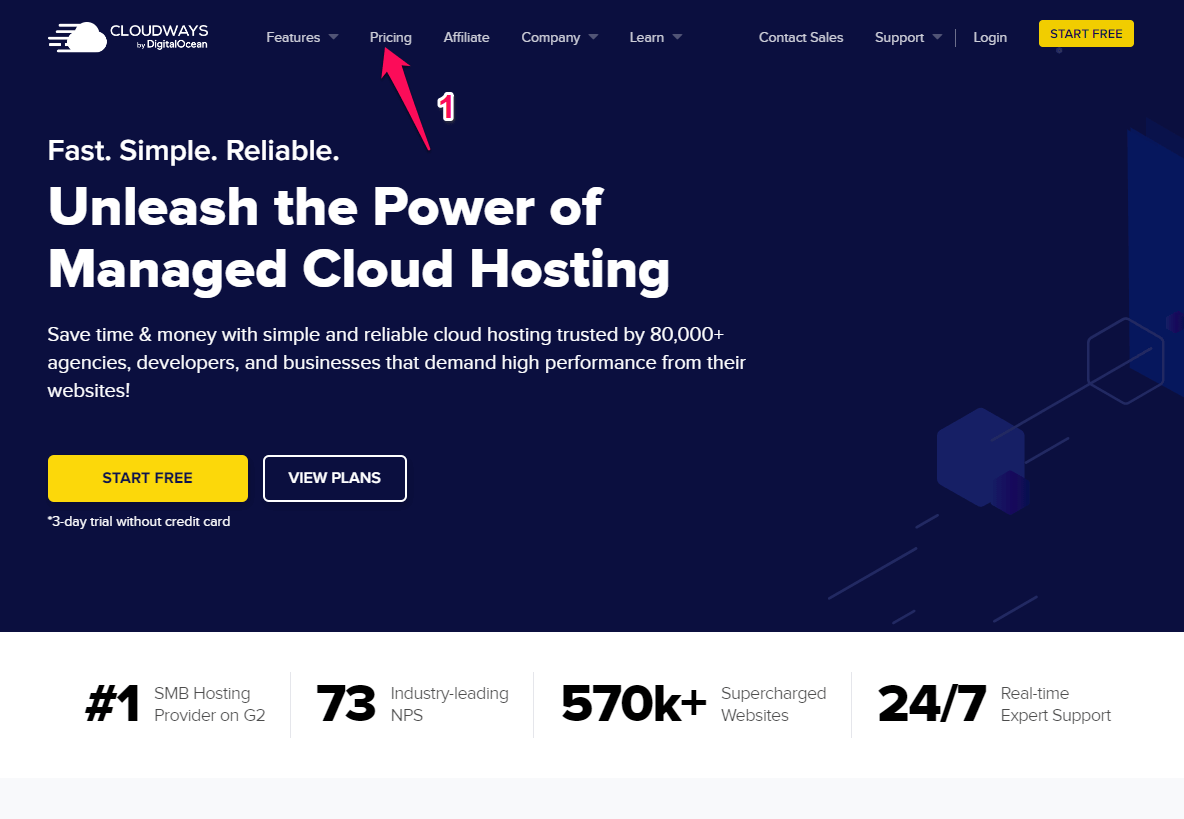
There, click on the “Pricing” option on the menu bar. That will show you the Cloudways plans and pricing.
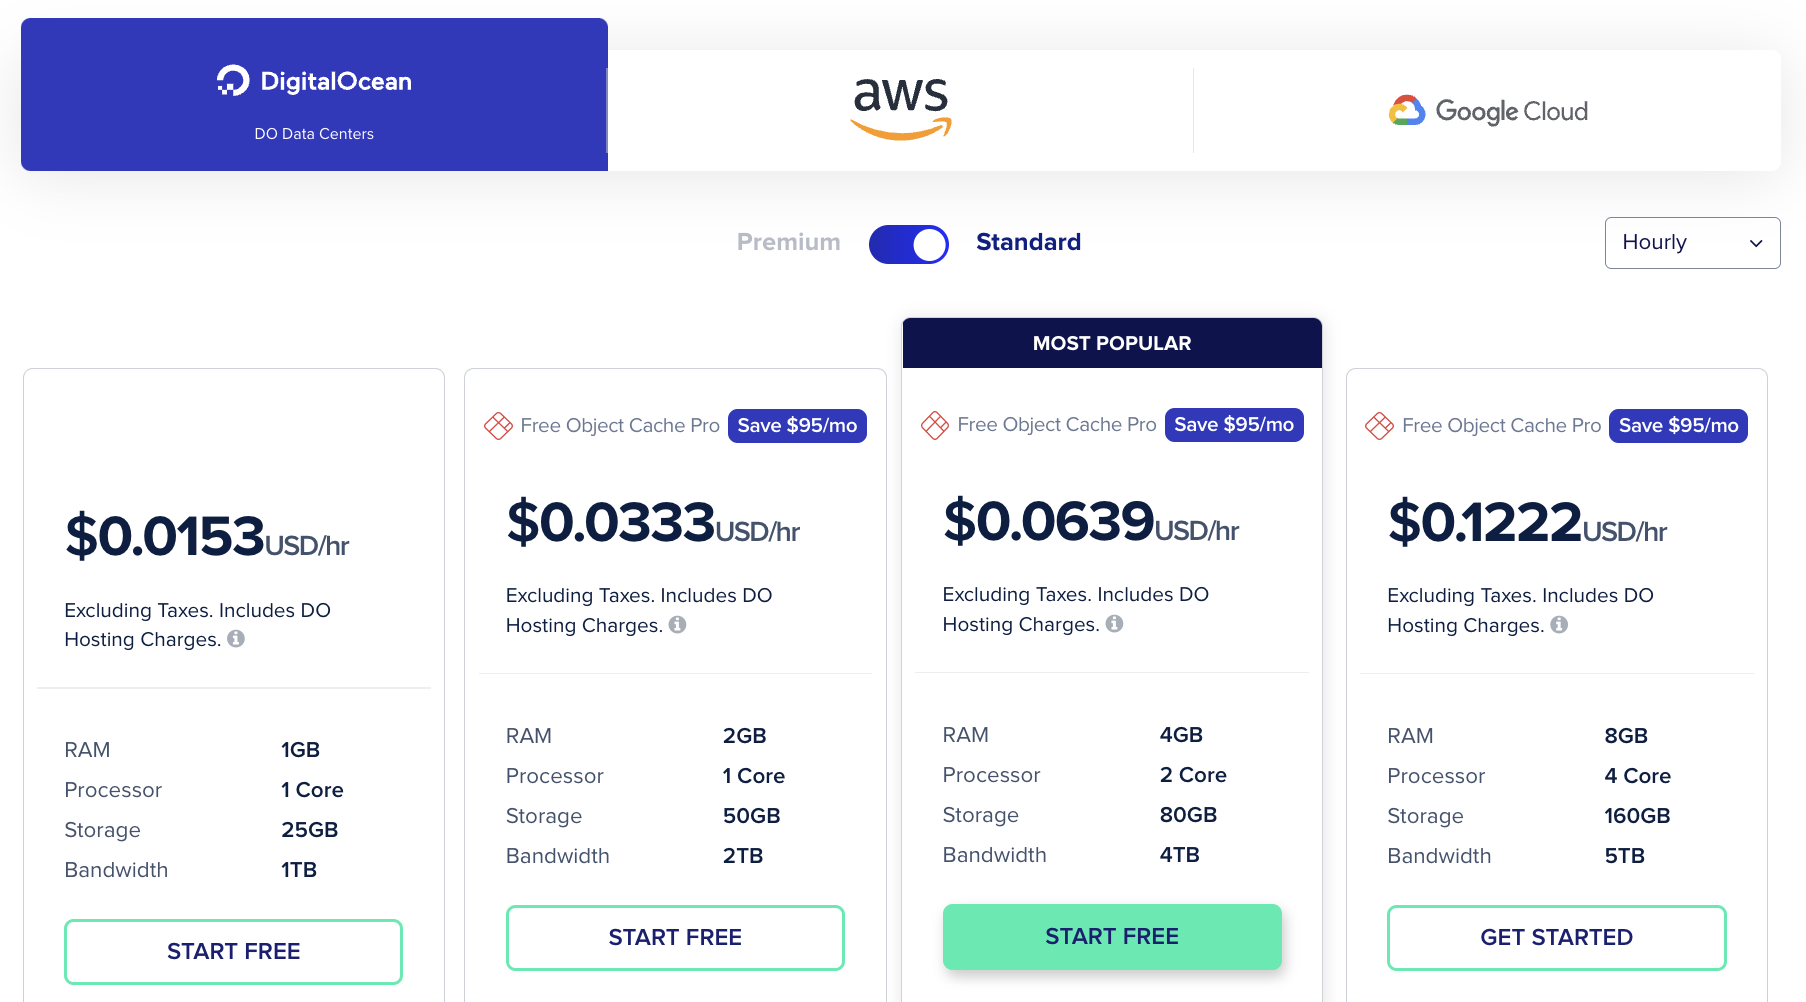
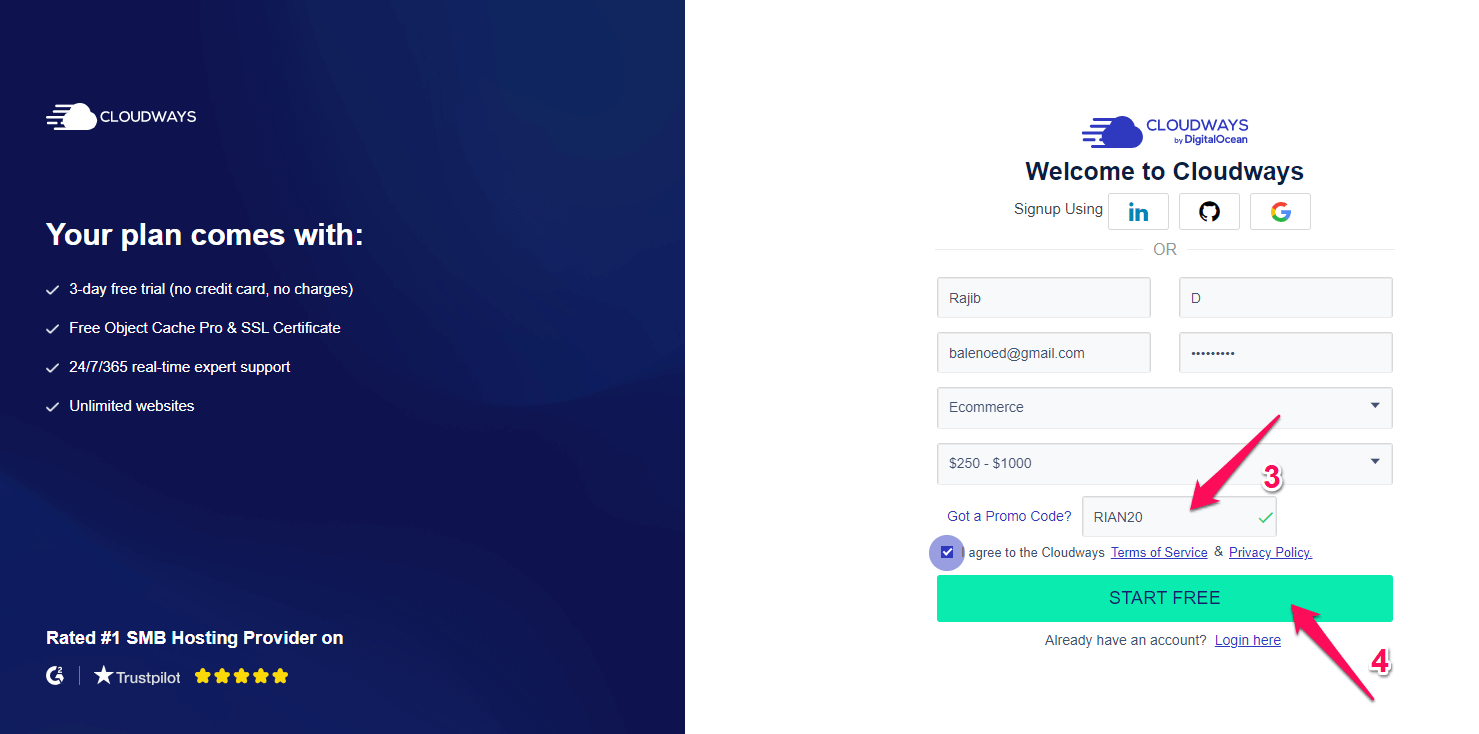
Choose a plan based on your requirements. Once done, click ” START FREE,” which will take you to the signup page.
You can enter the promo code ” RIAN20 ” to get 20% off for the first month.
2. Deploy Your Server
The next step is to choose a server. Enter the applicatiSignuprmation, server name, project name, etc. Then, select the server and the RAM size.
Choose the data centre close to your targeted audience. That will affect your server TTFB. The data centre location varies based on the server you choose.
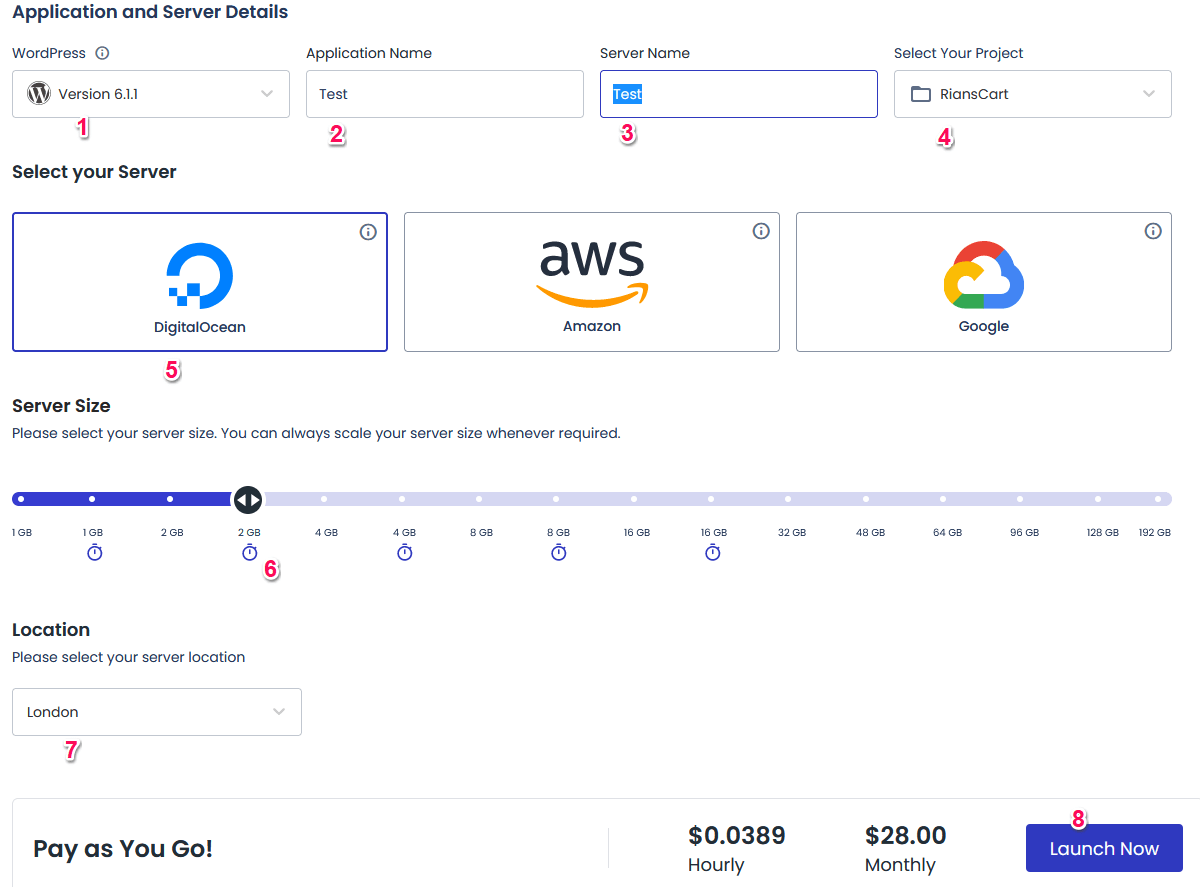
At the end, click “Launch Now.“
Deploying a server may take a couple of minutes (5-10 minutes). Please don’t refresh or close the page during the server deployment.
3. Launch Application
To add Applications, go to ” Applications” and click on “Add Applications.” Then, select the server for your application.
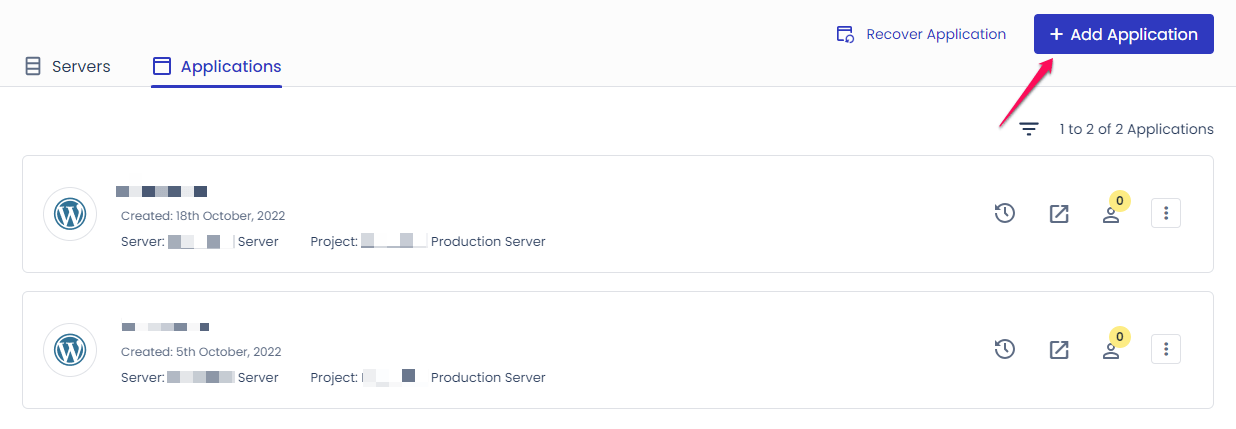
Select the server and click on ” Add Application.“
Then, select the type of application (for example, WordPress) and the name of your application, and finally, click “Add Application.”
It may take some time (2-3 minutes) for the application to get installed.
4. Install SSL Certificate
Once you have installed the application and clicked on the installed application, you will get the following window.
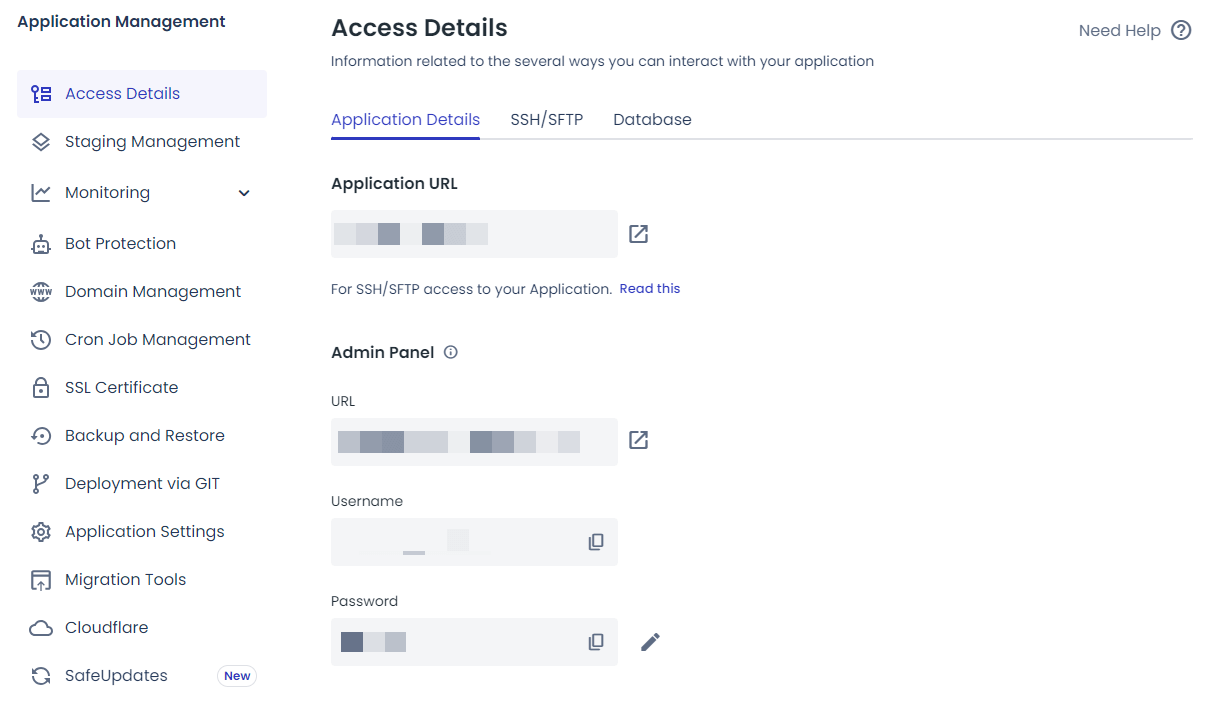
Here, you can see the temporary URL, temporary admin URL, Admin user name/ password, and the database details.
To access the hosting files, you need to create application credentials (4), as shown on the right.
To install the SSL certificate, please click the “SSL Certificate” option on the left.
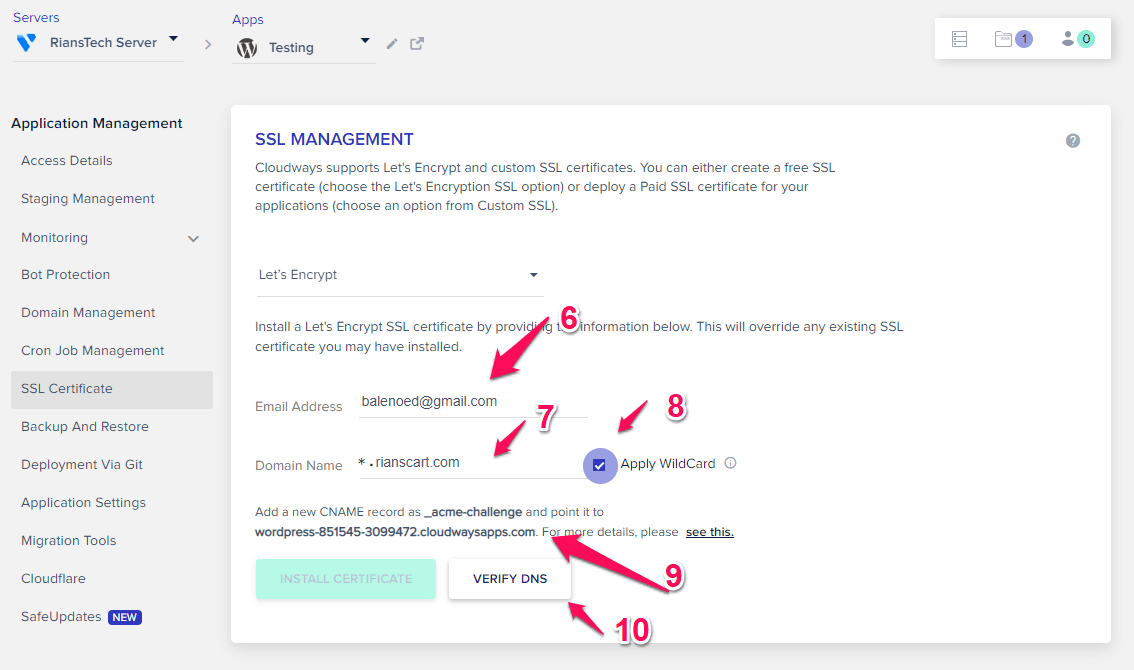
Enter the email ID and domain name on which you want to install the SSL certificate. Please check the ” Apply Wildcard ” option, as it will also install the SSL certificate for all subdomains (if added to Cloudways).
Finally, please add the CNAME records to your DNS registrar. After some time, click ” Varify DNS” to ensure the CNAME records are added.
Record Type: CNAME
Host Name:_acme-challenge
Value/Alias: wordpress-851545-3099472.cloudwaysapps.com [ This will vary based on your application]
After that, please click on “ Install Certificate.”
Cloudways has a nice video that explains the whole process. The below video shows the process of installing an SSL certificate on a single domain [No Wildcard]
5. Connet Your Domain
The final thing that you have to do is to connect your domain. When you installed the application, you got a temporary URL. Once you connect your domain, the temporary domain will be replaced by the actual domain.
To connect your domain, click on the ” Domain Management ” option.
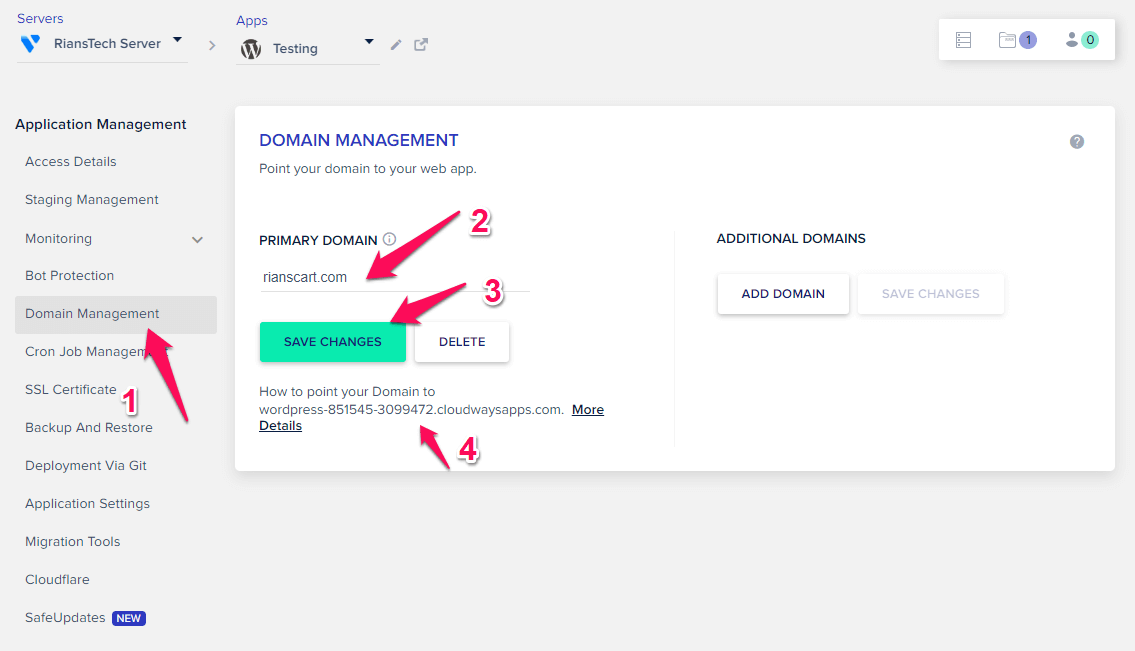
Enter your domain name and save the changes. You can add additional domains, as shown on the right.
Finally, you need to add the A Record and the CNAME record (4) to your domain registrar.
First Record
Record Type: A
Host Name:@ [ If you use Cloudflare, enter @, otherwise follow your domain registrar]
Value/Alias: Your Cloudways IP [ You will get that IP on your application details page]
Second Record
Record Type: CNAME
Host Name: WWW
Value/Alias: Your Cloudways IP [ You will get that IP on your application details page]
Once these DNS entries are live, you can access your website with the actual domain address.
That’s it. You are now hosted on Cloudways.
6. Request For Migration (In Case You Need it)
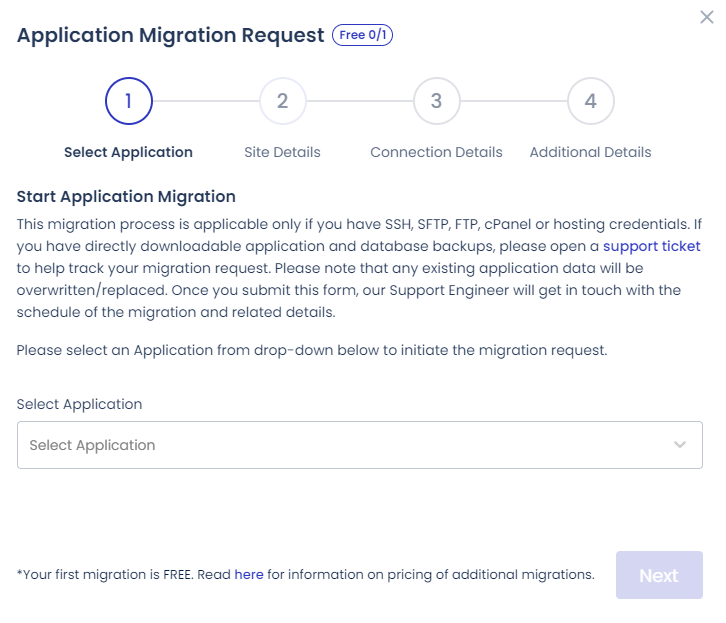
If you are moving away from another hosting provider to Cloudways, you can request free migration.
Please note that only the first website migration is free. Additional migrations will be charged at the rate below.
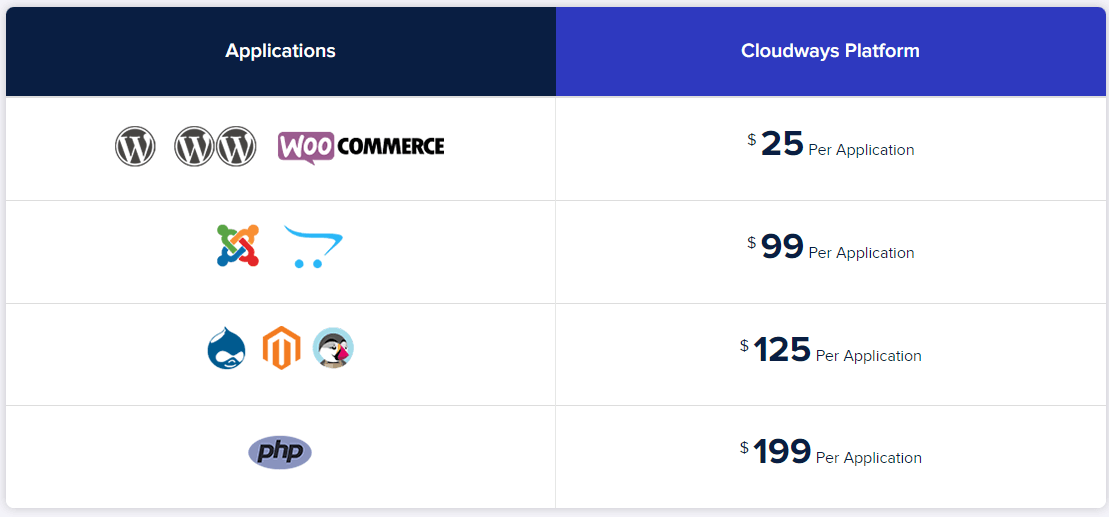
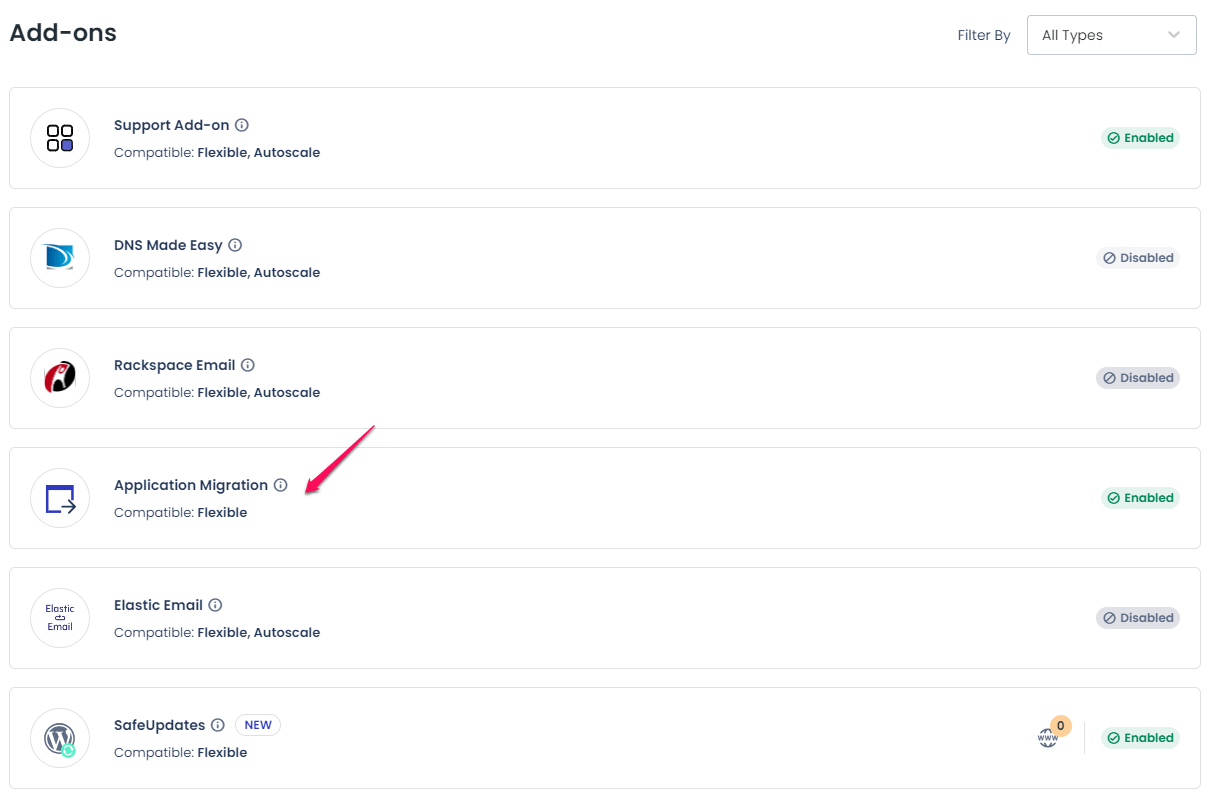
To raise a migration request, please go to ” Add Ons ” and submit it.
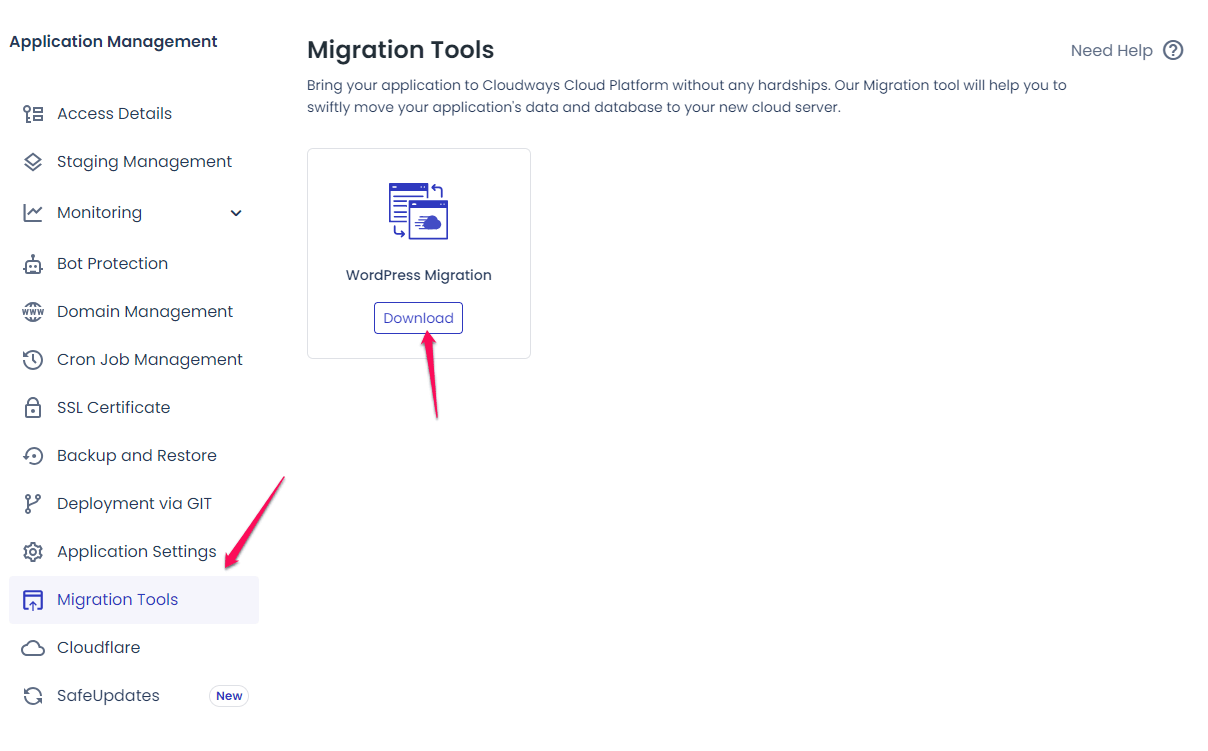
Did you know that Cloudways also has a migration plugin? That tool allows you to transfer your website very easily without any support.
You can download the migration plugin by following the below instructions.
Conclusion: How To Install WordPress
Installing WordPress is very easy. I hope after reading this article, it will be easier for you.
Most web hosts have their own mechanisms for installing WordPress. However, the two methods listed in this article are generic and can be used with any host.
The first method applies to web hosts that use the C panel. However, the second method applies to all web hosts, regardless of their control panel.
That’s all I have in this article. Hopefully, you got some useful information from it. If you have any questions, then write them in the comment section, and I will be happy to answer them.