In Windows, the Administrator has all the privileges, but in Linux, the Superuser or root has access to all commands, directories, files, and resources.
In this article, we will learn what a superuser is and how to create a root user in Linux.
Table of Contents
What Is A Superuser?
A superuser or root user in a Linux system is one of the most powerful users, having all the access, like an administration has all the access in Windows.
A root user also can assign root access to other users if needed. Ideally, the root user is the prime target of hackers to get into the Linux system as a root user has all the access.
By default, any Linux system will create a user named “Root” as soon as you install the operating system. We should disable the user ” Root” if you want to protect your Linux system from hacking.
How To Create A Root User In Linux?
Before you remove the root user, you need to create a new user and give him the root access so that the new user can do all the day-to-day tasks.
When you create a new user and give him root access, he can perform all the jobs that the root can perform.
Giving root access is also called “Sudo(substitute user do)” access. When a new user with root access runs any command, they have to use “Sudo” before every command.
For example, they have to use the following command to connect using ssh.
ssh root@192.68.56.12   //For root
sudo rajib@192.68.56.12   // For users with Root access
To create a new user and give them root access, follow the steps below.
1. Login To The Linux System With The Root User
To login to the Linux system using Root access, please run the following command.
ssh root@server-address2. Create A New User Account
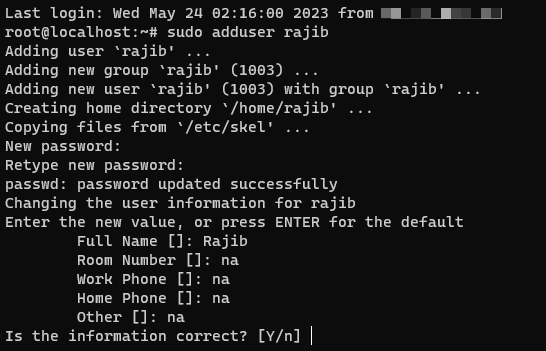
To create a new user, you need to run the “adduser” command.
sudo adduser rajibThe system will ask a set of questions. Answer those, and you are all set.

3. Add The New User To The “Sudo” Group
Adding the new user to the Sudo group means you are giving the root access to them. Please run the following command to add the user to the sudo group.
usermod -aG sudo rajib4. Test The New User
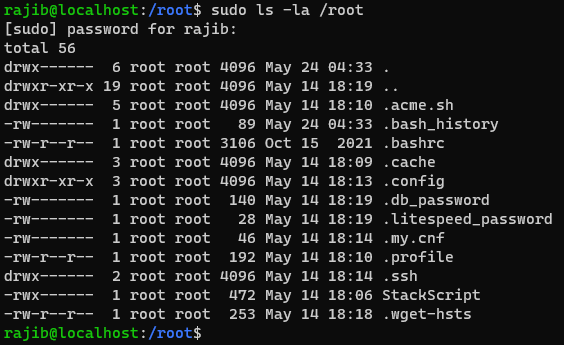
To test whether the new user has root access, please run the following command.
su - rajib
sudo ls -la /root
If you look at the following screen, you will see that the new user has root access.

5. Add A Public Key To The New user
You can not connect to your Linux system using the new user without a public key. First, you need to create a .ssh folder to do that. To do that, you can run the following command.
mkdir ~/.sshCreate the authorized_key file inside the .ssh folder and add the public key. Once pasted, please save the file.
sudo nano ~/.ssh/authorized_keys6. Varify The New User’s Login
You can run the following command to connect to your Linux server using SSH protocol.
ssh rajib@server_addressThat’s it. Now, you have created a new user and given root access. If you want to know how to secure your Linux server, you can read the following article.